How to Deploy a Node on THORChain
Do you know you can reap the rewards by running a node on THORChain? If you're looking to contribute to the security and efficiency of THORChain and explore how to get rewards, you've come to the right place.
In this guide, we'll walk you through the step-by-step process of deploying a node on THORChain, so you can easily support this thriving network.
What is a THORChain Node (THORNode)?
A THORNode is a computer that runs the THORChain software and participates in the THORChain network. THORNodes are responsible for:
- Processing swaps between assets on different blockchains
- Providing liquidity to the THORChain network
- Securing the THORChain network
To run a THORNode, you must stake a minimum amount of RUNE tokens. This RUNE is sent into the network as 'bond' and held as leverage on each node to ensure they behave in the best interest of the network. Running a malicious node or stealing from the network results in a slashing of this bond.
THORNodes are essential for the security and stability of the THORChain network. They help to ensure that swaps are processed accurately and that the network is resistant to attacks.
Here are some of the benefits of running a THORNode:
- You earn rewards in RUNE tokens for participating in the network.
- You help to secure the THORChain network and make it more resistant to attacks.
- You contribute to the development of the THORChain ecosystem.
If you are interested in running a THORNode, you can find more information on the THORChain website.
Here are some of the risks of running a THORNode:
- You could lose your staked RUNE tokens if you are caught running a malicious node or stealing from the network.
- You could be responsible for paying for the costs of running the node, such as hardware, software, and electricity.
- You could be exposed to legal liability if the THORChain network is used for illegal activities.
It is important to weigh the risks and benefits before deciding whether or not to run a THORNode.
THORNode Setup Requirements
- Operating system: THORNodes can run on most Linux systems.
- RAM: The minimum recommended amount of RAM is 16 GB, but you may need more if you plan on running a lot of applications on your node.
- CPU: A single CPU core is sufficient for most nodes, but you may want to use more cores if you plan on running a lot of applications on your node or if you want to improve the performance of your node.
- Storage: You will need some storage space to store the THORChain blockchain. The amount of storage space you need will depend on the size of the blockchain.
- Bandwidth: You will need a reliable internet connection with a decent amount of bandwidth. The amount of bandwidth you need will depend on the number of nodes that you are connected to and the amount of data that you are transferring.
- 1,000,000 RUNE collateral: In order to run a THORNode, you will need to provide 1,000,000 RUNE as collateral. This collateral is locked up and cannot be spent while the node is running.
- A dedicated IP address: THORNodes are required to have a dedicated IP address. This means that the IP address of your node cannot be shared with any other devices or services.
How to Deploy a THORNode on Linux
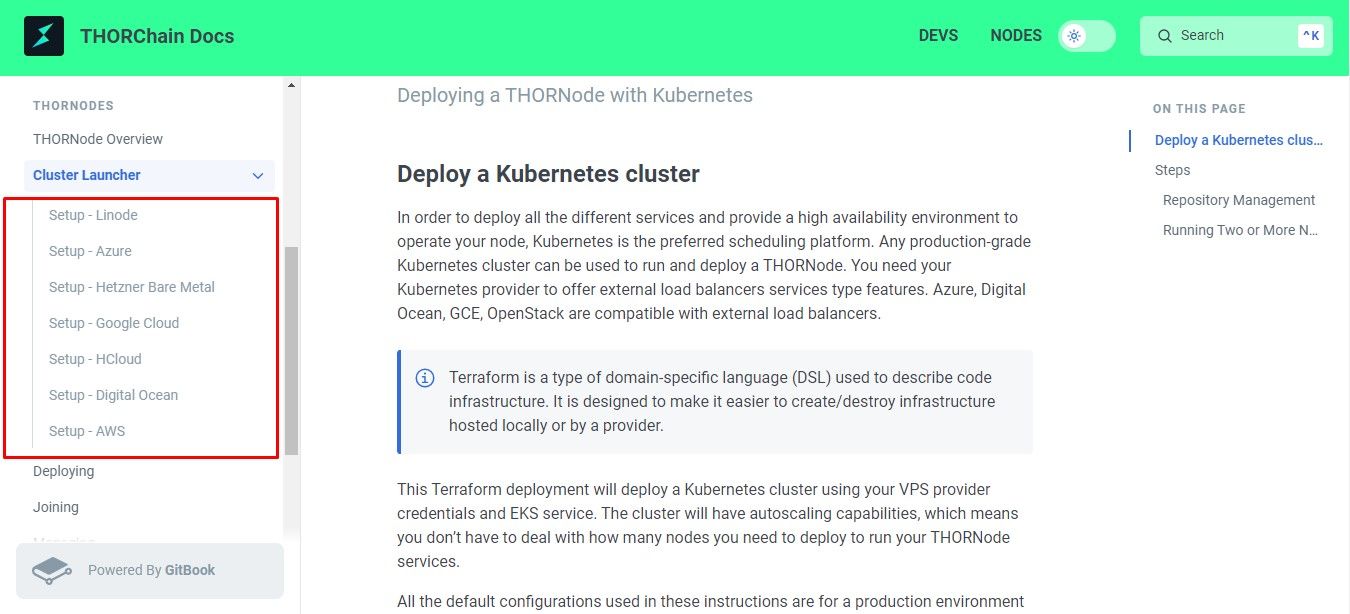
Step 1: Deploy a Kubernetes cluster
The first step is to set up a Kubernetes cluster. Currently, you have 7 computing options for Kubernetes cluster deployment, including Hetzner Bare Metal, Google Cloud, HCloud, Digital Ocean, AWS, Linode, and Azure.
Our topic picks are Linode and Azure. However, your final decision should be based on your preference. Navigate THORChain Docs - Kubernetes Cluster Launcher to set it up your way.
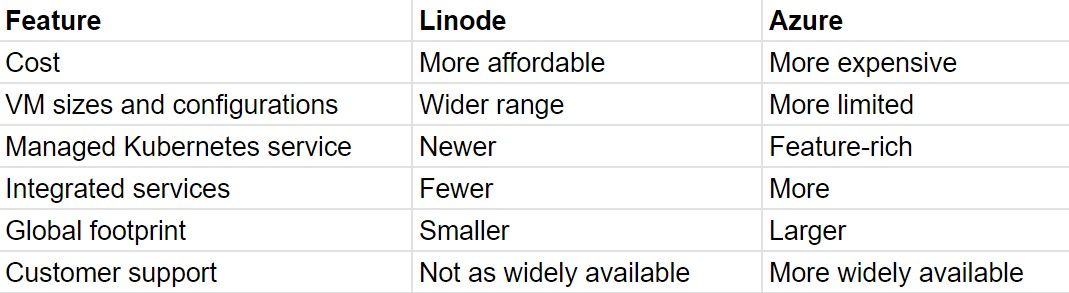
While we do not go into details about each option, we want to share a brief comparison between Linode and Azure. Note: opinions are perspective, don't forget to DYOR.
Step 2: Set up THORNode
Deploy THORNode services
Your Kubernetes cluster is now set up; the next step is to install the THORNode services. Make sure Kubectl configured, ready, and connected to the running cluster.
Clone the node-launcher repo. Run the following command:
After that, install Helm 3. You can skip this part if you've already done installing it.
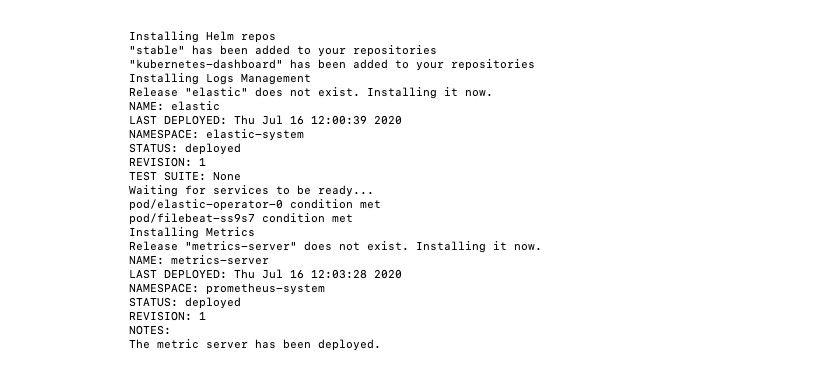
make helm make helm-pluginsNow, you can deploy all tools, metrics, logs management, and Kubernetes Dashboard by running:
make toolsor remove them by running:
make destroy-toolsThe expected results are:
If you encounter any problems, try re-running the command.
Deploy THORNode
Before deploying the THORNode services, make sure you deploy the tool first. Some services may have metrics configuration that could cause failure and halt the THORNode deployment.
THORChain has several commands for different configurations of THORNode. You can choose to deploy either the testnet or chaosnet/mainnet. By default, these commands will deploy the umbrella chart thornode-stack in the background within the Kubernetes namespace thornode(or thornode-testnet for testnet). Use the command make install to proceed.
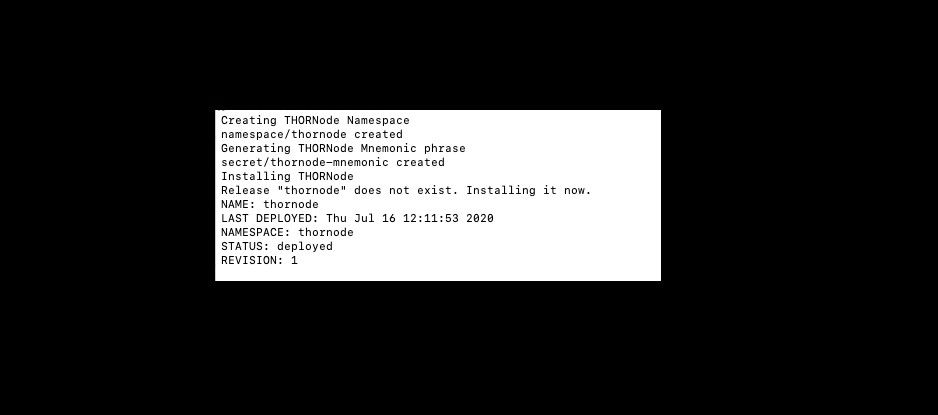
If you intend to run all chain clients, bond in & earn rewards, you want to choose 'Validator.' Deploying a THORNode will take 1 day for every 3 months of ledger history since it will validate every block. THORNodes are 'full nodes,' not light clients. If successful, you will see the following:
If your goal is to operate all chain clients, participate in bonding, and earn rewards, then selecting the 'Validator' option is necessary.
The deployment of a THORNode requires one day for every three months of ledger history, as it validates each and every block. It is important to note that THORNodes are full nodes rather than light clients.
Here is how a successful deployment looks:
Your THORNode is now up and ready to join THORChain. And it's just the beginning of many things you can do after you successfully deploy your node. Don't forget to check out the project's docs and channels for post-deployment and the latest updates.


