How to Deploy an OKB Chain Node on Linux: Full Node Setup

Are you eager to deploy a node on the OKB Chain? Our step-by-step guide will walk you through the process of setting up your first OKB Chain node and everything you need to do this.
What is an OKB Chain Node?
OKB Chain is a blockchain project developed by OKX, a renowned cryptocurrency exchange. OKB is the native token of OKB Chain and OKX. OKB Chain nodes are like computers that help the network work properly. There are two types of nodes: validator nodes and RPC nodes.
- Validator nodes are important because they make sure transactions are valid and keep the network secure. Only authorized nodes can be validators. You can see these nodes on OKLink Explorer.
- RPC nodes are service providers that let developers interact with the OKB Chain. They provide access to the blockchain for external applications. OKB Chain has its own public RPC endpoint, but others can also run their RPC nodes.
Running a node has benefits like better performance and access to blockchain data. There are two types of networks: mainnet (for real transactions) and testnet (for testing).
OKB Chain Node Setup Requirements
Minimum Hardware Configuration
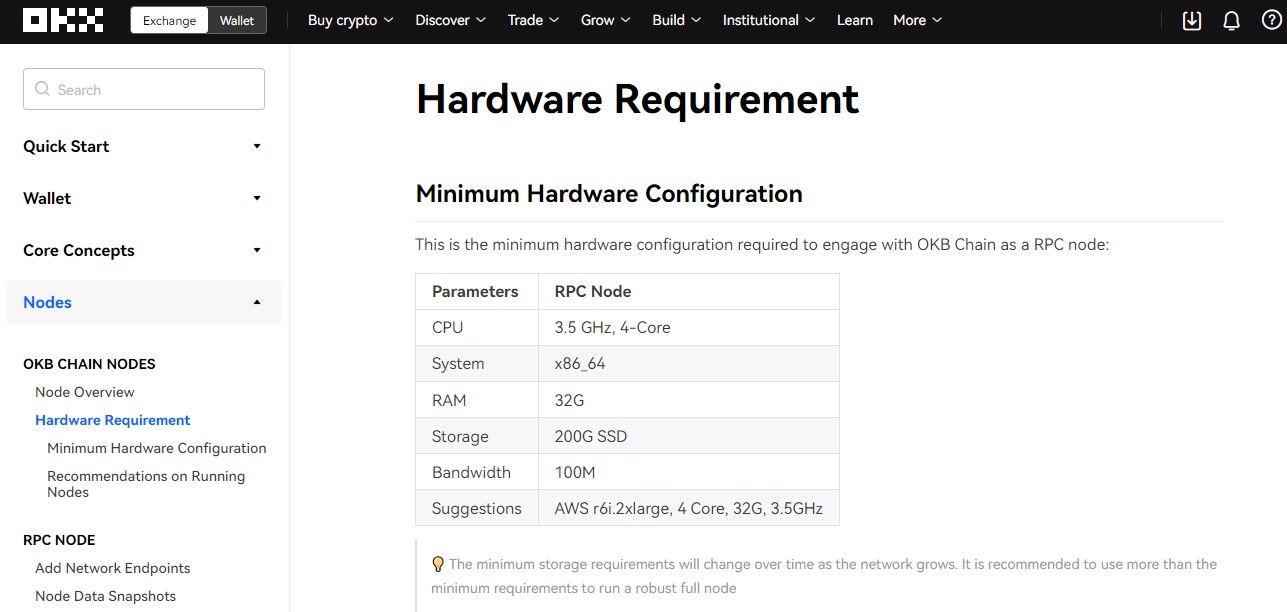
To operate an OKB Chain node effectively, you must meet the following minimum hardware configuration:
- CPU: 3.5 GHz, 4-Core
- System: x86_64
- RAM: 32GB
- Storage: 200GB SSD
- Bandwidth: 100M
Recommended AWS instance type:
- AWS r6i.2xlarge: 4 Cores, 32GB RAM, 3.5GHz CPU
Note: as the network grows, minimum storage requirements may change. For a robust full node, it's best to exceed the minimum hardware requirements. It's also advised to regularly check out Hardware Requirements for OKB Chain nodes.

System Recommendations
Background:
- OKB Chain nodes use level db to store block data and state data.
- Disks that are frequently read from require higher disk performance.
Problems:
- Using an ordinary cloud disk from Alibaba Cloud may lead to node synchronization lag.
Solutions:
- Use Standard SSD for Alibaba Cloud and AWS machines to ensure smoother synchronization and optimal node performance.
Following these requirements and recommendations will enhance your OKB Chain node's reliability and responsiveness, contributing to the network's overall efficiency.
How to Deploy an OKBC Node on Linux: Full Node Setup
Whether you join the public testnet or create your own OKBC localnet, the first-and-foremost step is to install OKBC. OKBC setup guide is available on OKX developers docs.
Initialize the node
- Start the node and generate the required configuration files:
okbchaind init <your_custom_moniker> --chain-id okbchaintest-195
NOTE: Only ASCII characters are allowed in monikers. If you use Unicode characters, your node will become unreachable.
You can edit this moniker later, in the ~/.okbchaind/config/config.toml file:
# A custom human readable name for this node
moniker = "<your_custom_moniker>"
To activate the anti-spam feature and decline incoming transactions with gas prices below the minimum, modify the ~/.okbchaind/config/okbchaind.toml.
# This is a TOML config file.
# For more information, see https://github.com/toml-lang/toml

##### main base config options #####

# The minimum gas prices a validator is willing to accept for processing a
# transaction. A transaction's fees must meet the minimum of any denomination
# specified in this config (Our recommended quantity is  10^-9 okb).

minimum-gas-prices = ""
Your node is now initialized!
Genesis & Seeds
Copy the Genesis File
Go get the testnet's genesis.json and put it in okbchaind's config directory.
To double-check if the configuration is correct, use the command:
okbchaind start --chain-id okbchaintest-195
Add Seed Nodes
To enable your node to find peers, make sure to include reliable seed nodes in the $HOME/.okbchaind/config/config.toml.
You have the option to add seeds in the ~/.okbchaind/config/config.toml file:
# Comma separated list of seed nodes to connect to
seeds = "f0721bd46ff3a9f9186cfe208c344d11ff918cd6@35.72.48.121:26656"
or add the seed node using flag when starting the node:
--p2p.seeds=f0721bd46ff3a9f9186cfe208c344d11ff918cd6@35.72.48.121:26656Get more details on seeds and peers here.
Start a New Node
- To start a full node, use this command:
okbchaind start --chain-id okbchaintest-195
- To check if the node runs smoothly or not, use this command:
okbchaincli status
JSON-RPC Endpoint
Upgrading Your Node
These instructions are for full nodes that have previously been running and want to upgrade to the latest testnet version.
Software Upgrade
Upgrade the software using the command:
git clone https://github.com/okx/okbchain.git
cd okbchain
git fetch --all && git checkout dev
make install
# start your node with the new version
okbchaind start --chain-id okbchaintest-195
NOTE: If you encounter any problems at this stage, make sure to verify that you have the most recent stable version of GO installed.
Note that we are using the dev version as it includes the most recent stable release. For more information about each release, kindly refer to the OKBC release page.
Your full node has been successfully upgraded!
Join the Public Testnet With Docker
Run OKBC testnet fullnode with docker
- Download the docker image
docker pull okbchain/fullnode-testnet:latest- Create the data directory
You can get the testnet snapshot from here and extract it into the ${DATA_DIR}.
Run docker container
# p2p.seeds help to connect to testnet
# rest.laddr expose rest service

docker run -d --name okbchain-testnet-fullnode -v ${DATA_DIR}:/root/.okbchaind/data/ -p 8545:8545 okbchain/fullnode-testnet:latest sh -c "okbchaind start --p2p.seeds=f0721bd46ff3a9f9186cfe208c344d11ff918cd6@35.72.48.121:26656 --rest.laddr=tcp://0.0.0.0:8545"
Notice: ${DATA_DIR} has to be an absolute path
View the running log
docker logs --tail 100 -f okbchain-testnet-fullnodeStop and restart the fullnode
- Stop
docker stop okbchain-testnet-fullnode- Restart
docker start okbchain-testnet-fullnodeRPC
You can use local RPC when docker reaches the latest block:http://localhost:8545
Our guide follows the relevant documentation available on the OKX domain. We encourage you to regularly check out OKX's node setup guide for the latest update.


