How To Stake Polkadot With Validators

Staking DOT (Polkadot) is a great way to earn passive income while contributing to the network's security. This guide will review the steps to stake DOT with validators. Staking with validators is one of the best ways to keep your crypto safe and within your own custody compared to staking on crypto exchanges where you may not have full control of your crypto.
What is DOT staking?
DOT staking is the process of holding and locking up a number of DOT tokens (the native cryptocurrency of the Polkadot network) over a period of time. The goal of staking is to participate in the network Proof-of-Stake consensus mechanism, help secure the network, and earn rewards.
Staking DOT tokens helps the Polkadot network's consensus mechanism and helps secure the network while earning rewards for additional DOT tokens. These rewards are distributed to validators in proportion to the amount of DOT they have staked and the length of time they have been staking.
Two common ways to stake Polkadot are staking Polkadot with validators and staking on the best staking platforms for Polkadot. In this article, we'll focus on staking Polkadot with validators.
Polkadot Delegators
A delegator is a token holder who delegates cryptocurrencies to a validator or a staking pool on a Proof-of-Stake (PoS) blockchain.
When you delegate stake to a validator, you specify:
- The ID of the node you're delegating to
- When you want to start/stop delegating stake (must be while the validator is validating)
- The number of DOT you are staking.
- The address to send any rewards to
Polkadot Staking Requirements
- A validator must stake a minimum of 250 DOT (to join the nomination).
- The minimum amount of DOT to stake for delegators is 120 DOT.
- The minimum staking period for validation is 28 days.
- There is no maximum staking duration for validation.
- The minimum time to stake DOT tokens for delegation is 28 days.
- There is no maximum amount of time to stake DOT tokens for delegation. The longer you stake, the more rewards you generate.
- The minimum delegation fee rate is 10%. Note: the fee will vary by the validator.
Polkadot Staking Rewards
The annual percentage rate (APR) that is paid in return for staking DOT to a validator is currently about 14%.
Get the latest Polkadot staking APR info with the below link:
Validators | Earn Staking Rewards | Run Polkadot Node
How to stake DOT validator: Step-by-Step Guide
The below guide will provide details on the staking process, delegating staked tokens & how to get node id for DOT holders.
Step 1: DOT wallet
First, you need to navigate the Polkadot staking page.
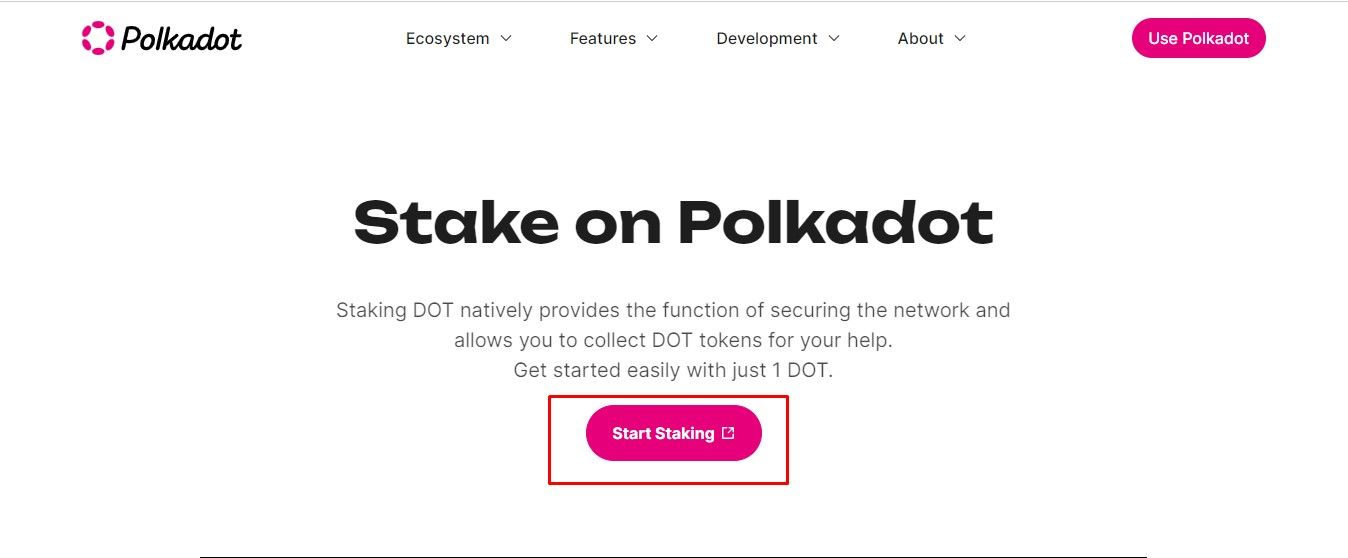
Select "Start Staking" and you will be directed to the staking network. Click "Connect" to connect your wallet on Polkadot staking network.
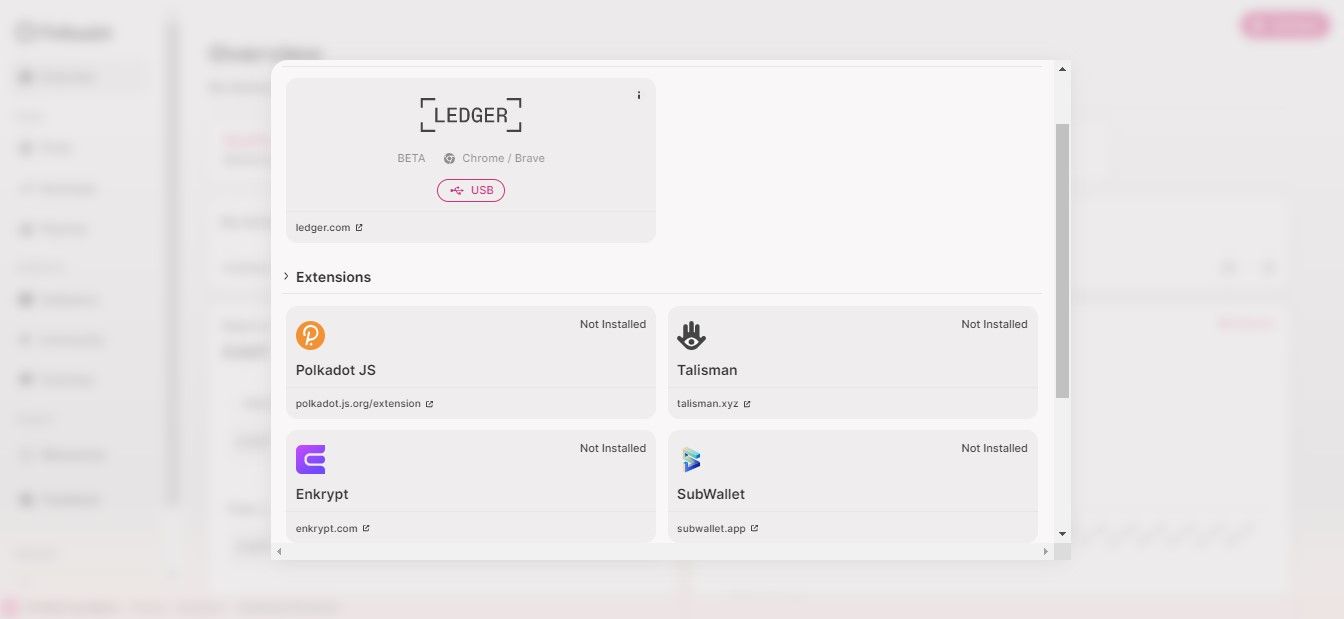
In addition to the supported wallets, you can also stake Polkadot on the hardware wallet Ledger.
Step 2: Buy DOT
You will need to purchase DOT. You can buy DOT on various cryptocurrency exchanges such as Binance, Bitfinex, or Kraken. Use our guide on how to buy DOT tokens on the Binance exchange to get started.
Step 3: Choose Polkadot Validator (Start Nominating)
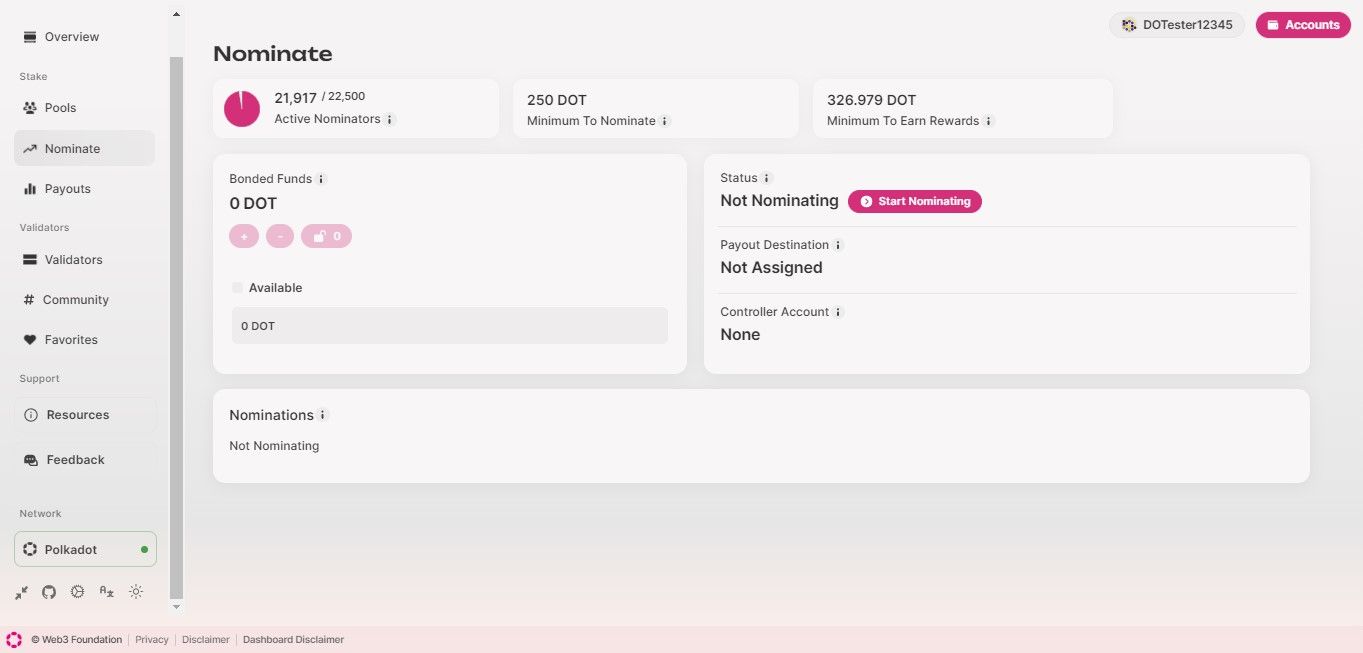
Polkadot offers various staking options, including becoming a nominator or joining a pool. As a nominator, you will have to bond DOT and choose the validators you wish to back up to a maximum of 16. To receive rewards as a nominator, you currently need to bond a minimum of 326.979 DOT.
Alternatively, joining a pool is a more cost-effective option, as it only requires a minimum deposit of 1 DOT. When you join a pool, the nomination of validators is taken care of on your behalf, and you can easily claim rewards from the pool.
Furthermore, creating your own pool is also possible, but you'll need to have a minimum of 500 DOT.
What are validators?
What is a blockchain validator node? - Blockchain Guide
Step 4: Select Reward Destination
To receive your staking rewards, you must select a reward destination from three options:

- Compound: Rewards will be added to your existing bonds in your Stash account (reward combo).
- To Your Account: Rewards will be deposited as a transferable balance in your Stash account (no bonus combinations).
- To Another Account: Rewards will be transferred as a transferable balance to any account of your choice.
You can select the validators you wish to nominate in the following step. On Polkadot, you can choose up to 16 validators, while Kusama allows up to 24.
Now, you can enter the amount you wish to stake, but we advise against staking the entire balance in your account. To pay for future transaction fees, keep some transferable balance aside.
This step will also display important information for you to consider. The slider at the bottom will indicate whether your stake meets two thresholds:
a. To nominate (Nominate line)
b. To nominate activities and receive rewards (Active line)

If your staking amount is less than the first line, you cannot fully nominate, and the app will not allow you to stake. Currently, this limit is set at 250 DOT on Polkadot.
If your staking amount exceeds the first line but falls below the second line, you can stake, but your account will not participate in the voting mechanism (i.e. you will not nominate any real validators), and you will not receive rewards! This limit is dynamic and may change over time.
If all three areas are filled in, as shown in the image above, you can start staking and receiving rewards!
Once you enter the staking amount and click continue, you will see a summary. Review it and click "Start Nominating" to stake your coins!

Finally, sign the extrinsic to complete the process. Once the extrinsic is broadcast to the network, you will be redirected to the Nominations tab, where you can view all the details of your staking as shown.

Step 5: Unstaking DOT
Unstaking Your DOT If you decide to unstake your DOT, you will need to go through a similar process to delegating your DOT. You will need to select the validator and then unstake your tokens. It is important to note that there is a cooldown period after unstaking, during which you cannot withdraw your DOT.
Best DOT Validators For Staking
Not sure about choosing the proper validator for staking your tokens? Check out our guide on the top five validators for staking Polkadot tokens based on their staking rewards, node uptime, and the number of DOT tokens available to stake.
Our staking validator guides are released monthly to reflect the changing dynamic nature of validator nodes and to provide the best up-to-date validating node info.
Start staking your Polkadot tokens today!
Popular Tags : Stake Polkadot With Validators, Staking DOT, DOT tokens, Staking DOT tokens, Best staking platforms for Polkadot, Polkadot Delegators, Polkadot Staking Requirements, Polkadot Staking Rewards


